If you came to this page without reading the introduction please go back for a brief introduction, the advantages of this method and how it works.
Advantages
Connect following devices securely and anonymously to the Internet using the wireless link even if the devices does not support wireless connection.
- Gaming consoles like Nintendo Wii, Microsoft Xbox, Sony Playstation, etc.
- Digital media receivers or home entertainment device like Apple TV, Xbox 360, Mac Mini, Roku Netflix player, Western Digital TV Live Media Player, D-Link Media Lounge, Netgear Digital Entertainer HD
- Any other devices, laptops, wi-fi phones, HTPC, media server etc. that connects to Internet using Ethernet or wireless adapter
- Add wireless access to a wired peripheral or devices
- Extend wireless network range
- Whole house networking
Requirements
- Ace Premium SSL VPN account or Ace Ultimate SSL VPN account
- 2 Wireless routers. The client router has to run Tomato firmware with VPN mod. The primary router can be anything. In fact, it doesn’t even need to be a router that you have administrative access to!
- If you do not have a router flashed with Tomato. Please flash it first with the Tomato VPN build with Web GUI by SgtPepperKSU and continue with the instructions. Check if your router is supported
Warning
- This tutorial requires basic knowledge about routers and networks. If you have no prior knowledge we suggest you to familiarize about routers and networks before you continue
- Flashing third party firmware can void your routers warranty
- AceVPN.com is not responsible for any damage to the hardware, systems, or personal injury if you do attempt this!
- Only attempt if you are confident in your skills!
Assumptions
- Primary or host router will be referred as Router A
- Secondary or client router will be referred as Router B
- Router A internal IP is 192.168.1.1 and subnet is 255.255.255.0
- Router A has wireless enabled
- Router B settings has been reset to factory defaults
Router B: Configuration Steps
- Connect a PC to the Lan port of the Router B
- Using your browser, login to the admin page of Router B. By default this is available at http://192.168.1.1
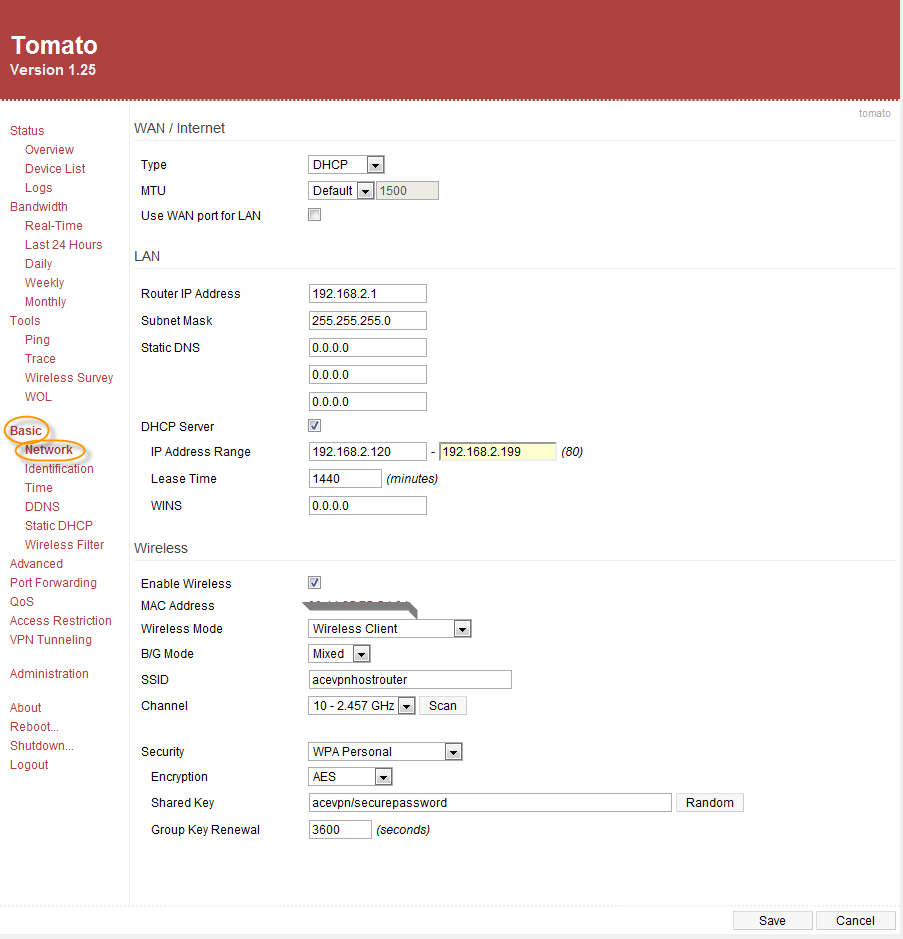
- Go to Basic > Network and set values as per below
- Router IP Address: 192.168.2.1
- Subnet Mask: 255.255.255.0
- DHCP Server: Checked
- IP Address Range: 192.168.2.120 – 192.168.1.199
- Enable Wireless: Checked
- Wireless Mode: Wireless Client
- B/G Mode: Mixed
- SSID: acevpnhostrouter. Should be same as Router A
- Security: WPA Personal. Should be same as Router A
- Encryption: AES. Should be same as Router A
- Shared Key: Enter the secure key of Router A
- Hit the Save button
Lan
Wireless
It would look like below screenshot when above steps are completed
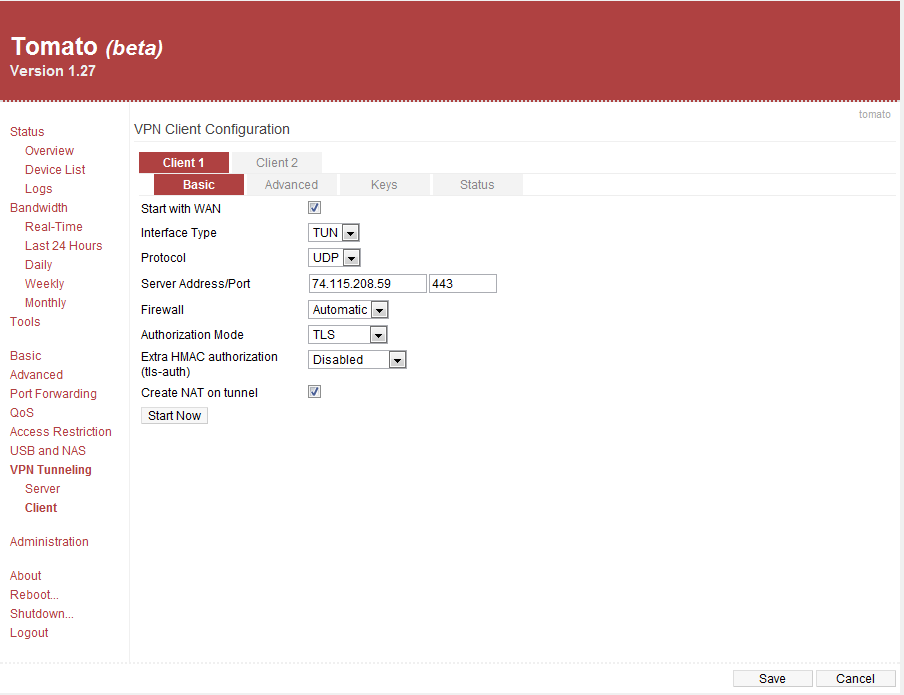
- Go to VPN Tunneling > Client Settings tab and set values as per below
- Start with WAN: Checked
- Interface Type: Tun
- Protocol: UDP
- Server Address/Port: 94.23.114.100 443
- Firewall: Automatic
- Authorization Mode: TLS
- Extra HMAC authorization (tls-auth): Disabled
- Create NAT on tunnel: Checked
Client1 > Basic tab
It would look like below screenshot when above steps are completed
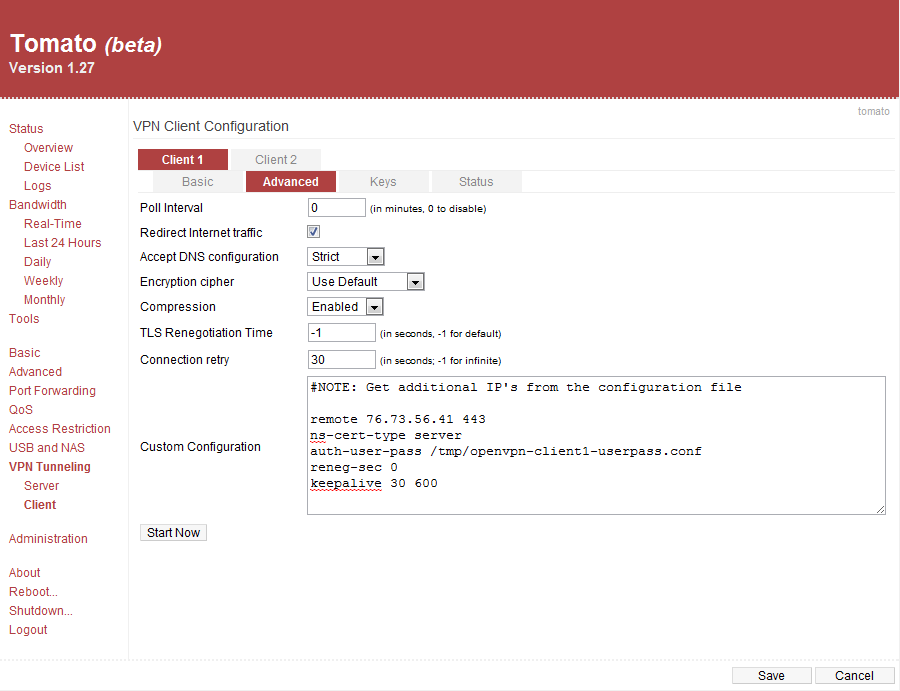
- Redirect Internet Traffic: Checked
- Accept DNS Configuration: Strict
- Encryption cipher: Use Default
- Compression: Enabled
- TLS Renegotiation Time: -1
- Connection Retry: 30
- Custom Configuration:
#NOTE: Get additional IP’s from the configuration file
remote 76.73.56.41 443
ns-cert-type server
auth-user-pass /tmp/openvpn-client1-userpass.conf
script-security 3
reneg-sec 0
Client1 > Advanced tab
It would look like below screenshot when above steps are completed
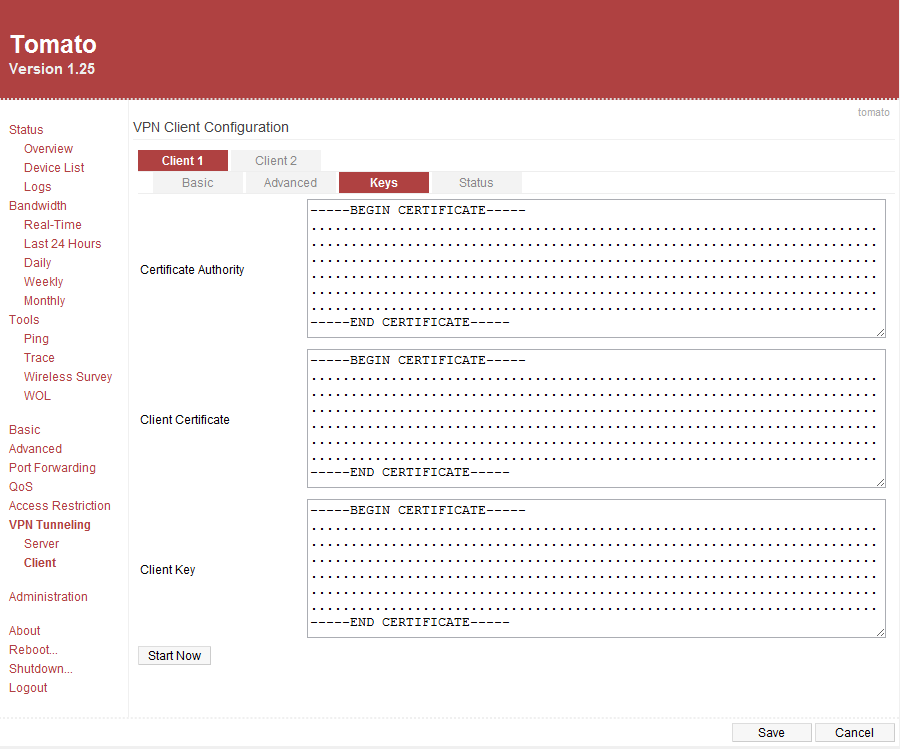
- Certificate Authority: Paste the contents of acevpn-ca.crt
- Client Certificate: Paste the contents of acevpn-user.crt
- Client Key: Paste the contents of acevpn-user.key. This is the password file. Do not share this with anyone.
- Hit the Save button to save changes
Client1 > Keys tab
It would look like below screenshot when above steps are completed
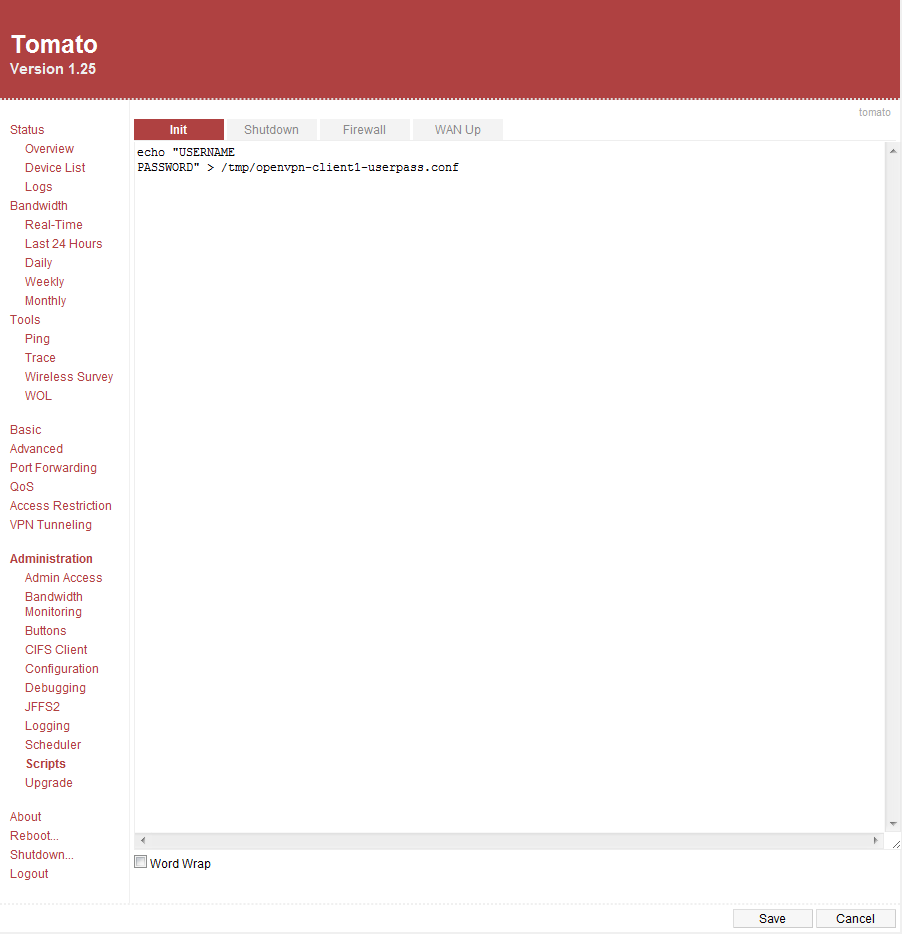
- Go to Administration > Script > Init tab and set values as per below. Replace the USERNAME and PASSWORD with the credentials you received from Ace VPN and hit Save button
echo “USERNAME
PASSWORD” > /tmp/openvpn-client1-userpass.conf
It would look like below screenshot when above steps are completed
Now reboot your router and wait for a minute for the router to establish a secure tunnel with Ace VPN gateway. Now open up a browser and go to Ace VPN home page to make sure the VPN tunnel is established.
If you have additional questions or need help please contact us
